2010 : Ponsel China Beralih ke Android

INILAH.COM, Jakarta - Setelah fitur TV pudar, ponsel China sukses menangkap fenomena Facebook. Untuk 2010 sekarang, ponsel China siap menawarkan Android, dengan harga tetap di bawah Rp2 juta.

President Director Taxco Indonesia Djong Surianda mengatakan, pasar ponsel QWERTY yang cocok untuk jejaring sosial masih akan sangat dominan di 2010. Namun begitu pihaknya juga menyiapkan ponsel berbasis sistem operasi Android.

“Ponsel Android itu untuk lebih menerobos pangsa pasarnya,” katanya di Jakarta, kemarin. Menurut Surianda, pihaknya siap mengeluarkan produk dengan harga tidak lebih dari Rp2 juta.

Ia menyebut hasil pengamatan internal terhadap tiga produk yang diluncurkan di 2009 terjadi fenomena menarik, karena yang lebih laku ternyata yang berharga lebih mahal. “Ini berarti ponsel China bukan dari segi harga saja yang diinginkan konsumen, melainkan juga kualitas dan fitur,” jelasnya.

Manager Marketing Byon Indonesia Tan Bunarta mengatakan persaingan ponsel China di 2010 akan semakin ketat. Hal itu karena jumlah vendor yang masuk akan bertambah, apalagi dengan dibukanya kerjasama perdagangan bebas dengan China. “Kami menargetkan pertumbuhan penjualan 30% di 2010,” kata Abun panggilan Tan Bunarta.

Senada dengan Taxco, Byon mengeluarkan produk dengan kisaran harga di bawah Rp2 juta. Harga rendah itu untuk mendorong penjualan produk ponsel QWERTY low end dan mid end.

“Kompetitor ponsel lokal lain di 2010 ini akan banyak mengeluarkan ponsel low end, sehingga arah Byon akan menggarap lebih serius di pasar low end dan mid end,” imbuhnya.

Selain Android, ponsel China juga memantapkan messenger antar sesama ponsel mirip dengan BlackBerry. Lokal Messenger berbasis Java itu akan lebih dikembangkan pada 2010 dan saat ini sudah tahap persiapan teknis dari beberapa merek.

Surianda mengatakan messenger ponsel China diharapkan bisa meluncurkan layanannya paling lambat pada Maret 2010. Konsorsium pun telah dibentuk bertujuan memperluas pangsa pasar ponsel lokal di Indonesia. “Ada beberapa merek ponsel China yang masih belum sepakat karena masih memonopoli server messenger,” tandasnya.

Ia menambahkan messenger lokal ini bisa digunakan seluruh vendor ponsel China, sehingga penggunanya bisa mencapai di atas 100 ribu. “Lokal Messenger itu memang kesepakatan antara sesama ponsel China untuk dikembangkan dengan tujuan menyaingi BlackBerry Messenger,” tambah Surianda.

Namun begitu operator bergeming dengan langkah ponsel China itu. Head of Marketing Indosat Teguh Prasetya mengatakan perkembangan BlackBerry di 2010 akan terus tinggi. Indosat menargetkan pengguna BlackBerry bisa mencapai 500 ribu atau tumbuh minimal 100% dari saat ini yang sudah lebih dari 250 ribu pelanggan.

“Untuk layanan data mobile, Indosat berusaha mempertahankan posisinya sebagai market leader terutama pelanggan BlackBerry diharapkan ada pertambahan,” katanya. Teguh mengatakan meskipun kuat di layanan data, layanan voice Indosat masih menyumbang revenue terbesar sebanyak 60%. Sementara 40% dari layanan data dan SMS. [mdr]


(istimewa)


Syamsudin Prasetyo

Android, BlackBerry dengan Server Lokal

Jakarta - BlackBerry besutan Research in Motion (RIM) dinilai memiliki kelemahan berupa kontrak eksklusif dan kontrol yang tersentralisasi oleh perusahaan asal Kanada itu.

Berbeda dengan sistem aplikasi Android buatan Google yang memiliki basis piranti terbuka dan pusat datanya bisa ditempatkan di mana saja.

"Lain halnya dengan BlackBerry, nanti server Android akan kita kelola sendiri," kata Chief Marketing Officer Indosat, Guntur Siboro, kepada detikINET, Jumat (15/1/2010).

Pengguna BlackBerry dalam mengakses konten lokal maupun internasional, trafiknya harus terlebih dulu melewati Internet Protocol (IP) lokal ke gateway RIM yang ada di Kanada. Baru kemudian kembali lagi ke akses regional, hingga akhirnya sampai tangan pengguna di Indonesia.

Alur jaringan yang berputar-putar ini menyebabkan delay panjang untuk mengakses konten data di BlackBerry. Berbeda dengan Android yang menggunakan konsep Open Cloud Computing agar pusat datanya bisa dikelola dari mana saja.

"Nanti, Android akan kami jadikan BlackBerry dengan server lokal," ujar Guntur.

Android juga diklaim akan memiliki kemampuan yang tak kalah hebatnya dengan layanan data yang disediakan BlackBerry. Khususnya untuk akses layanan data internet tanpa batas.

"Itu sebabnya, Android harus ada unlimited package. Kami hitung-hitung, per user Android setiap bulannya memerlukan kuota 2 GB," pungkas Guntur. ( rou / faw )


Ponsel Android (letsgomobile)

Achmad Rouzni Noor II - detikinet

2010, LG Luncurkan 5 Ponsel Android


Foto Int
Perang ponsel berbasis Android bakal seru di 2010. Setelah Motorola, Nexus, dan HTC, kini LG ikut mengenalkan ponsel mereka yang berbasis Android. Bahkan, tak tanggung-tanggung, LG Electronics Indonesia mengaku siap memasukkan lima produk Android di 2010 ini.

Rencananya mereka akan memasok lima jenis ponsel Android itu dalam waktu dekat ini.
"Kita melihat Android semakin popular namanya di dunia, tentunya kita ingin memasok ponsel dengan OS tersebut di tanah air. LG akan memasukkan sekira 3 sampai 5 ponsel Android di tahun 2010 ini," jelas Product Marketing LG Indonesia, Richard Susilo, di MU Cafe, Jakarta, Senin 11 Januari.

Salah satu handset yang disebutkan Richard akan dibandrol sekira Rp3 jutaan. Harga ini termasuk murah, dengan desain ponsel menggunakan papan ketik QWERTY hingga teknologi layar sentuh.
Ponsel Android besutan Google itu juga akan dibarengi dengan peluncuran 3 ponsel lainnya yang berbasis Windows Phone atau Windows Mobile 6.5.

Menurut Richard, ponsel-ponsel itu akan diluncurkan secara bertahap dan akan digelontorkan mulai kuartal pertama di 2010. Richard juga membocorkan, ponsel LG yang menggunakan Windows Phone akan dipatok lebih murah dari ponsel Android, dengan harga kisaran Rp2,5 juta.

"Mengapa lebih mahal? Karena Android merupakan teknologi baru, banyak orang awam yang belum mengetahuinya. Salah satu ponsel Android tersebut adalah GW620 yang akan menyasar segmen menengah ke atas," tambahnya.

Sementara itu, dikatakan Richard, pihaknya juga akan menyiasati keterbatasan aplikasi Android dengan menekan operator dan pengembang aplikasi lokal untuk memperkaya aplikasi.
"Pola bundling dengan operator atau tidak, masih akan kita pelajari. Namun, LG akan menyiasati aplikasi Android dengan menekan para pengembang untuk membuat aplikasi Android tersebut," terangnya.

Seperti diketahui, ponsel Android yang masuk ke tanah air masih menggunakan sistem Open Handset Distribution (OHD), yang artinya pengguna tidak bisa mengunduh ke Android Market, selama tidak ada lisensi yang diberikan Google. (bs)

http://www.fajar.co.id/

CyanogenMod-4.2.13


Another build in the “stable” series which should greatly improve stability. The services code should be backwards compatible so apps with persistent services should behave better. All-new multitouch code using the 2.0 API was added. Contacts app updated. Many other bugs fixed!

Get it with CM Updater or check out the XDA Developers thread!

PS : untuk Android 1.6

cyanogenmod.com

How To: Load a Custom ROM on the Nexus One (Updated 1.11.10)

Have root access, but now you want to load some custom ROMs for even MORE features?! We’ll we’re here to help :)

Thanks Paul at Modaco!
Thanks Amon Ra!

I. Before You Begin

1. You MUST have root access! Do our How To Root the Nexus One procedure and THEN come back to this procedure and continue.

II. Flash a Custom Recovery Image

1. Download the Nexus One Amon Ra Recovery Image below:

Nexus One Recovery Image (Link under Download in the first Post)

2. Save the recovery image file inside the superboot folder you used to root the phone.

3. Turn the phone off and then plug it in via USB cable.

4. Turn it on by holding down Power and the Trackball to get into fastboot mode.

5. Open a command prompt and type the following with hitting enter at the end of each line:

cd\
cd c:\superboot
fastboot-windows devices

*this is to check that the computer can see the phone (a serial should pop up if it can)

6. Then type:

fastboot-windows flash recovery recovery-RA-nexus-v1.5.3.img

7. This should flash the recovery image onto the phone.

III. Flash the Custom ROM

1. Download the ROM you want from our Android ROMs section. (Make sure to choose a ROM for the Nexus One and not another phone!)

2. Turn off the phone.

3. Turn it back on by holding down Home and Power until the recovery screen comes up.

4. Select Nandroid Backup (to save a backup just in case)

5. Then select Mass Storage On and plug your phone into the computer.

6. Copy the ROM .zip file to your phone’s SD card then unplug the phone.

7. Click USB MS Toggle.

8. Click Apply .zip from SD Card and then select the ROM you just copied.

9. Wait for it to finish loading and click Reboot. All done!

How To: Root the Nexus One (Updated 01.11.10)

Multitouch, custom ROMs, maybe even Sense UI on your Nexus One? We’ll it all begins with rooting it first. So thanks to Paul at Modaco here’s how.

I. Root the Nexus One

1. Download Superboot (first download link on the page)

Superboot

2. Once it is saved to your computer, unzip it to your C: by right clicking it and clicking Extract Files…
Once it is extracted to the C:, rename the folder to Superboot (this will make life easier later).

3. Turn off your Nexus One and then plug it in to your computer via USB cable.

4. Turn the phone back on by holding down the trackball and hitting power (keep holding it down until the fastboot screen comes up).

5. Open the Command Prompt on your computer by opening the Start Menu, then either typing cmd and hitting enter in the search box (for Vista and higher) or by clicking Run and typing cmd and hitting enter (for XP).

6. Once it opens type the following with hitting enter at the end of each line:

cd\
cd C:\Superboot
fastboot-windows devices

*Your phones serial number should display proving that it is connected and your computer can see it.

Then type:

fastboot-windows oem unlock

7. Then follow what the screen says to do on your phone and select Yes.

*You may get an error in the command prompt, just ignore it.
**Also your phone may reboot, if it does just turn it off, then turn it back on by holding down Power and the Trackball to get back to fastboot before continuing on to the next step.

8. Now, while the phone is still connected, go on your computer to the Superboot folder and open it. Inside you will see a file called, install-superboot-windows.bat

9. Double click install-superboot-windows.bat and wait for it to finish. All done, rooted!

II. Load a Custom ROM (OPTIONAL)

theunclocker.com

DroidDraw

Aplikasi ini digunakan untuk membuat UI (User Interface) berbasis XML untuk aplikasi android. Sangat memudahkan

This tool was written to make my Java programming life easier. It can be used to build graphical user interfaces for the Android cell phone platform. I hope you find it useful for whatever Android/Java cell phone software development projects you have planned!

Please post any bugs that you find or requests for improvement on the issues list.
Thanks and enjoy!

News! - DroidDraw standalone executable available: (Mac OS X, Windows, Linux)

Website : Droiddraw

Root Htc Magic


Saya melakukan ini pada HTC Magic 32a

1. Download APK ini lalu simpan di komputer anda:

FlashRec.apk (Updated: 09/26/09)

Amon Ra’s Recovery Image (32B)(Updated 10.14.2009, DOWNLOAD THE LATEST ONE!)

Amon Ra’s Recovery Image (32A)(Updated 10.04.2009) <>

2. kalo sudah didownload ke komputer, lalu pindahkan ke sdcard , jangan di dalam folder tapi langsung di sdcardnya (root forlder) .

3. cabut hape dari komputer.

4. buka Market lalu cari Astro File Manager , secara bawaan ROM emang belum ada file manager nya, tunggu sampai selesai dan terinstall.

5. buka Astro File Manager lalu pilih SDCard kemudiancari file FlashRec apk yang tadi lalu klik. jika ada pilihan untuk dibuka dengan apa, maka pilih Open App Manager lalu tunggu hingga selesai.

6. BUka Program FlashRec lalu pilih Backup Recovery Image dan tunggu hingga proses selesai.

7 (FOR 32A ONLY) jika sudah selesai, klik di box kosong di program FlashRec lalu ketik : /sdcard/recovery-RA-magic-v1.3.2H.img <>

7 (FOR 32B ONLY) jika sudah selesai, klik di box kosong di program FlashRec lalu ketik: /sdcard/namafile-Recovery-yang-tadi-didownload.img

8. Lalu klik tombol Flash Custom RecoveryImage dan tunggu hingga selesai.

9. matikan hape anda lalu nyalakan kembali untuk masuk ke Recovery mode dengan menahan tombol home+power hingga muncul layar Recovery mode .. text dengan latar belakang warna hitam..

10. dah segitu aja , jika recovery mode anda sudah berhuruf hijau dan berlatar belakang hitam , berarti sudah berhasil


SAYA TIDAK BERTANGGUNG JAWAB ATAS KERUSAKAN YANG MUNGKIN AKAN TERJADI PADA DEVICE ANDA


Disadur dari : theunlocrk.com & tux.or.id

Emulator Android

Emulator Android adalah aplikasi berbasis QEMU yang menyediakan Virtual ARM Mobile Device yang bisa digunakan untuk menjalankan aplikasi-aplikasi android. Dan sangat bermanfaat ketika kita mengembangakan aplikasi Android


Tentu kita tidak bisa melakukan panggilan, menerima telepon, berkirim SMS, atau menggunakan GPS, secara langsung. Tetapi bisa digunakan untuk menjalankan aplikasi yang sesuai versi Androidnya, yaitu versi 1.1 , 1.5 , 1.6 ,2.0 atau 2.1, tergantung versi dari SDK. Bahkan jika kita terkoneksi dengan internet, maka kita bisa melakukan browsing langsung dari Emulator seperti aslinya.

Untuk menggunakan emulator, kita bisa men Download SDK Android terlebih dahulu, tempatkan pada sembarang folder.

Membuat AVD (Android Virtual Device)

Untuk versi windows dari menu konsol DOS, kita arahkan ke folder tool/ misal kita menempatkan di D:\armies\android-sdk-windows-1.6_r1\tools kemudian buat terlebih dahulu AVD perintahnya :

android create avd -n <name> -t <targetID> [-<option> <value>] ...

misal : android create avd -n AVD
-t 4
(untuk API 4 - android versi 1.6)

Kemudian untuk menjalakankannya, :

emulator -avd <avd_name>

misal : emulator -avd AVD

Maka akan muncul emulator seperti pada gambar diatas, untuk mengubah orientasi menjadi landscape gunakan kombinasi Ctrl+F11 :


Silahkan digali infonya lebih lanjut ke : Learn Android Emulator

ROM Eclair : Manup456’s Eclair (2.1) updated to v1.5


ROM Eclair untuk -Mobile G1 / MyTouch3G (Katanya bisa juga untuk Magic) silahkan cek

Manup456 has updated his Eclair ROM to version v1.5 for the T-Mobile G1 / MyTouch3G. The new Release has also updated the base code to Android 2.1 and has a working Camera.


Eclair_2.1-v1.5Camera working-Thank You NCommander since he posted the source I hear
LiveWallpaperPicker
CubeWallpaper
Cleaned up a few things….

Eclair_2.0.1-v1.4-v1.4r2
Custom Kernal BFS 313 (By Jac)
ext2/3/4 squashfs AUFS FS support
TCP optimizations TCPv6 included
all debugging off
multiple security patches
deadline io w/ fifo_batch=1
iptables WiFi tether support
usb tether patch
Tons of moduled support CIFS etc
app_s and app folder working out of data folder
GlobalSearch fixed keywords working
compcache fully working
new notification pull down bar
build.prop trout and sapphire edits
MotoAccuWeather and PinyinIME

etc……


Head over to Manups456’s AndroidSPIN Developer Homepage for more information and downloads

Source : http://www.androidspin.com/


Nexus One - Unboxing Photos

January 11th, 2010

Nexus One - Unboxing
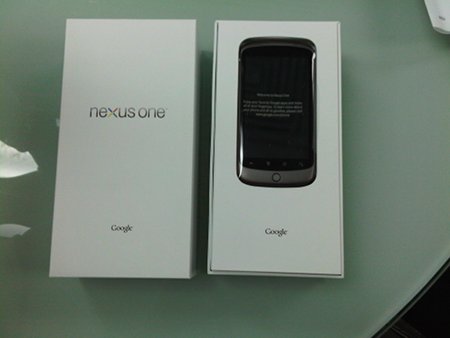
Like mentioned before, I ordered a Nexus One. Just 5 days after ordering the phone, it arrived here (in Hong Kong). The phone’s box looks kind of like an Apple product box. Plain white, not much written on there and a bit stylish. However, it doesn’t reach the Apple “stylishness”.

It still looks nice and delivery via DHL was no problem at all. I could track the package since it started shipping from the US. Google Checkout showed that the package was sent out from “Google Phone Webstore” and then the DHL tracking stepped in and everything was easy going. Anyway, I hope the phone is charged soon so I can start playing around with it :)

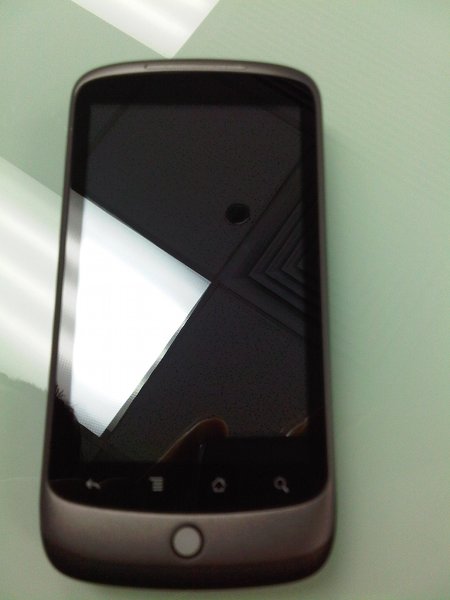
Here are some unboxing photos in chronological order:


Nexus One - Unboxing

Nexus One - Unboxing

Nexus One - Unboxing

Nexus One - Unboxing

Nexus One - Unboxing

Nexus One - Unboxing

Nexus One - Unboxing

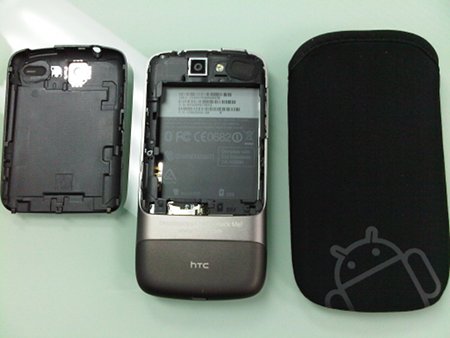
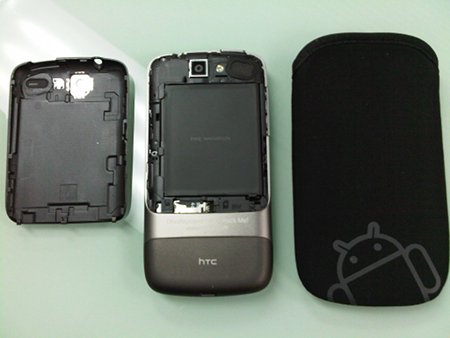
As you can see, the phone comes with:

  • Battery
  • US Power Cord
  • Micro-USB cable
  • Phone bag with little Android

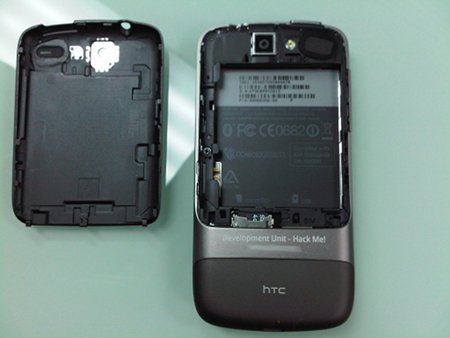
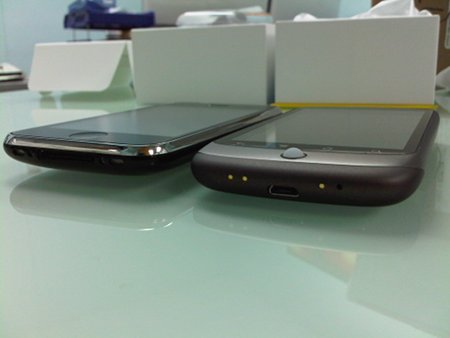
From the last picture you can see that there are three little contacts. Though there is no docking station delivered with the device I guess this is for a future docking station (probably provided by HTC or other accessories manufacturers).

ShareThis

Nexus One

January 6th, 2010
Nexus One

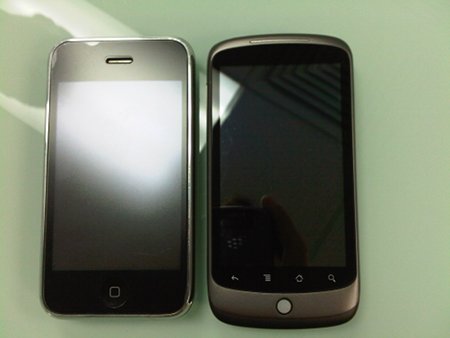
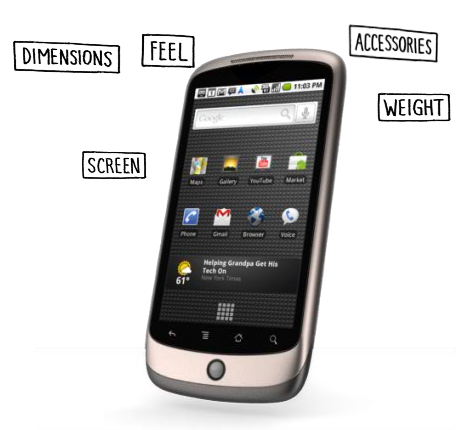
IMHO, this is quite chic. I have to say that I am kind of surprised by the design. While the OS itself is pretty much the same on all devices; we distinguish Android phones more by their design and usability. Respectively, reviews say that the phone feels very fast - faster than all other Android phones on the market. Well, the huge processor must be there for something. But despite that the Nexus One just looks cool. I think I have to get one for “testing purposes” … :) No seriously, this is one of the pretty phones I have seen so far. Not just Android phones, I am talking about all smartphones you can compare the Nexus with. Well, the iPhone still looks great and I am actually loving the design of the new BlackBerry Bold 9700 as well.

The best thing is that you can get it unlocked without any SIM card limitation for just US$529 directly from Google. That is exactly what the developer community needs. A quasi standard phone for cheap which can be used for developing anywhere. They tried that already with the G1 for Developers but that didn’t work that well. For example, I was not able to order one because they could not ship to my country or whatever. Anyway, the Nexus One seems to be great and it will kick off the Android developer community as we get a great phone for less money!

Technical Specs

Power and battery

  • Removable 1400 mAH battery
  • Charges at 480mA from USB, at 980mA from supplied charger
  • Talk time: Up to 10 hours on 2G; Up to 7 hours on 3G
  • Standby time: Up to 290 hours on 2G; Up to 250 hours on 3G
  • Internet use: Up to 5 hours on 3G; Up to 6.5 hours on Wi-Fi
  • Video playback: Up to 7 hours
  • Audio playback: Up to 20 hours

Processor

  • Qualcomm QSD 8250 1 GHz

Operating system

  • Android Mobile Technology Platform 2.1 (Eclair)

Capacity

  • 512MB Flash
  • 512MB RAM
  • 4GB Micro SD Card (Expandable to 32 GB)

Location

  • Assisted global positioning system (AGPS) receiver
  • Cell tower and Wi-Fi positioning
  • Digital compass
  • Accelerometer

Size and weight

  • Height: 119mm
  • Width: 59.8mm
  • Depth: 11.5mm
  • Weight: 130 grams w/battery; 100g w/o battery

Display

  • 3.7-inch (diagonal) widescreen WVGA AMOLED touchscreen
  • 800 x 480 pixels
  • 100,000:1 typical contrast ratio
  • 1ms typical response rate

Camera & Flash

  • 5 megapixels
  • Autofocus from 6cm to infinity
  • 2X digital zoom
  • LED flash
  • User can include location of photos from phone’s AGPS receiver
  • Video captured at 720×480 pixels at 20 frames per second or higher, depending on lighting conditions

Cellular & Wireless

  • UMTS Band 1/4/8 (2100/AWS/900)
  • HSDPA 7.2Mbps
  • HSUPA 2Mbps
  • GSM/EDGE (850, 900, 1800, 1900 MHz)
  • Wi-Fi (802.11b/g/n)
  • Bluetooth 2.1 + EDR
  • A2DP stereo Bluetooth
Nexus One Landscape

While the technical specs are interesting but not that astonishing let’s take a closer look to the supported formats:

Image

  • JPEG (encode and decode), GIF, PNG, BMP

Video

  • H.263 (encode and decode) MPEG-4 SP (encode and decode) H.264 AVC (decode)

Audio encoders

  • AMR-NB 4.75 to 12.2 kbps sampled @ 8kHz

Audio decoders

  • AAC LC/LTP, HE-AACv1 (AAC+), HE-AACv2 (enhanced AAC+) Mono/Stereo standard bit rates up to 160 kbps and sampling rates from 8 to 48kHz, AMR-NB 4.75 to 12.2 kbps sampled @ 8kHz, AMR-WB 9 rates from 6.60 kbit/s to 23.85 kbit/s sampled @ 16kHz., MP3 Mono/Stereo 8-320Kbps constant (CBR) or variable bit-rate (VBR), MIDI SMF (Type 0 and 1), DLS Version 1 and 2, XMF/Mobile XMF, RTTTL/RTX, OTA, iMelody, Ogg Vorbis, WAVE (8-bit and 16-bit PCM)

Well, not much new in here too as those formats are supported by Android already. Still, I like the phone though. Well done Google!

More about the Google Nexus One:

http://www.androiddevelopment.org/

SDK Android 2.1 Realese 1

Date: January 2010
API Level: 7

Android 2.1 is a minor platform release deployable to Android-powered handsets starting in January 2010. This release includes new API changes and bug fixes. For information on changes, see the Framework API section.

For developers, the Android 2.1 platform is available as a downloadable component for the Android SDK. The downloadable platform includes a fully compliant Android library and system image, as well as a set of emulator skins, sample applications, and more. The downloadable platform includes no external libraries.

To get started developing or testing against the Android 2.1 platform, use the Android SDK and AVD Manager tool to download the platform into your Android SDK. For more information, see Adding SDK Components.


Platform Highlights

Android 2.1 does not add significant user features, see the Android 2.0 Platform Highlights document for the latest user features.

Framework API

The sections below provide information about changes made to the application framework API provided by the Android 2.1 platform.

API level

The Android 2.1 platform delivers an updated version of the framework API. The Android 2.1 API is assigned an integer identifier — 7 — that is stored in the system itself. This identifier, called the "API Level", allows the system to correctly determine whether an application is compatible with the system, prior to installing the application.

To use APIs introduced in Android 2.1 in your application, you need to set the proper value, "7", in the attributes of the element in your application's manifest.

For more information about how to use API Level, see the API Levels document.

API changes summary

The following is a summary of some notable changes to the framework APIs.

Live Wallpapers

The following additions provide APIs for you to develop animated wallpapers:

Telephony

Views

WebKit

  • New WebStorage methods to manipulate web storage databases.
  • New GeolocationPermissions methods to get Geolocation permissions from, and set them on the WebView.
  • New WebSettings methods to manage settings for app cache, web storage, and zooming based on screen density.
  • New WebChromeClient methods for handling video, browsing history, custom Views, app cache limits, and more.

API differences report

For a detailed view of all API changes in Android 2.1 (API Level 7), as compared to API Level 6, see the API Differences Report.

Menginstall Aplikasi Android pada Emulator

Untuk mencoba aplikasi yang kita ambil langsung dari internet pada emulator kita bisa mulai dari setup AVD apabila belum. Dan tentunya komputer dimana kita menjalankan emulator ini terhubung langsung dengan internet. Satu hal lain adalah kita juga menyiapkan SD Card Virtual, karena ketika kita mendownload aplikasi akan disimpan pada SD Card.

1. Langkah pertama untuk membuat AVD, kita buka Android SDK dan AVD manager (Asumsi Eclipse telah terinstall ADT) :


2. Maka akan terbuka jendela Android SDK dan AVD Manager :


3. Klik pada New, kemudian akan muncul jendela Create new AVD, silahkan masukkan parameternya. Misal kita membuat :
  • Android SDK 1.5
  • SD Card 4GB
  • Skin Built-in HVGA
  • Hardware : SD Card support & Audio playback support (Untuk menambahkan ini, klik new pada Hardware)


4. Klik Create AVD, tunggu beberapa saat Sehingga pada jendela Android SDK dan AVD Manager terlihat pada daftar AVD yang ada.


5. Klik pada Start untuk menjalankan emulator, tunggu beberapa saat sehingga muncul emulatornya


6. Kita klik pada Browser, kemudian kita masukkan alamat, klik pada Menu > Go dan ketikkan alamat yang ingin dituju, dalam hal ini : www.androidfreeware.org dimana kita bisa mendownload aplikasi gratis android.


7. Kemudian pilih aplikasi yang ingin kita install, misal kita memilih aplikasi instant messenger Meebo :


8. Setelah Download selesai, kita klik pada Meebo.apk kemudian install


9. Setelah terinstall langsung bisa kita jalankan, dan pada Menu Launcher kita bisa melihat ada icon shortcut aplikasi Meebo yang baru saja kita install. Untuk menjalankan bisa langsung kita klik pada icon tersebut


TDA Bisnis Forum Semarang

Tgl 16 Mei 2010, Semarang


Return top